 I decided that these would be fantastic bulletin boards for the summer/beginning of the year and open house next year.
The original idea for this project comes from Experiments in Art Education. I would like to share my experience with this project with you, along with a few tips so that if you decide to do it with young classes, it will be easy, breezy and beautiful.
I decided that these would be fantastic bulletin boards for the summer/beginning of the year and open house next year.
The original idea for this project comes from Experiments in Art Education. I would like to share my experience with this project with you, along with a few tips so that if you decide to do it with young classes, it will be easy, breezy and beautiful.First of all, I would just like to say that I am not a control freak. If you have control issues, beware of doing this with kindergarten and first grade....I set some ground rules, but some kids either did not 'get' the rules, or they ignored them. Its okay, the murals still look great!!
I covered each of my 6 tables with a big sheet of bulletin board paper, and I painted a couple of them with words: ART, MUSIC, HEALTH, LIBRARY (I could've made Counselor, Office, P.E. too, but I only have 6 tables and I wanted a few plain murals without words.) Mrs. Novak suggest this in her post.
When the students walked in, I told them, do not sit down, put on a paint shirt and STAND behind your normal seat. I explained that we would be doing some group painting, but they needed to follow a couple of rules.
Rule #1, do not paint over anyone's work
Rule #2, paint shapes that do not touch all over the paper
I did a quick demonstration of the type of shapes that work well (with everyone gathered around one table) and said to make lots of sizes and spread them around the big paper.
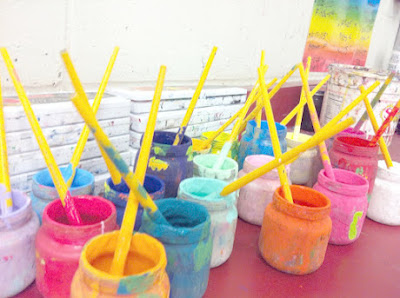
Then I had students line up to get a jar of black paint. Since I store my paint in baby food jars, I reminded them to be careful not to drop them.
My first grade classes are freakishly small this year....I have one class of 14! Students worked pretty quietly, and even though I demonstrated what kind of shapes to paint, some still insisted on practicing stars....making big solid black blobs on the murals. GAH!
Once there were lots of shapes, I told them to connect each shape with lines. I wish I would have told them to draw lines to the edges of the paper. But its okay, they murals still turned out great!
 Some of the murals with large words like ART or MUSIC had lines drawn straight through the letters. But that's okay.
My students have an hour of art, and this project only took up about 20-25 minutes...even after I gave some basic instructions and a brief demonstration, AND we put on paint shirts.
We created 6 murals.
I would suggest that you have something for those that are 'done' painting to do....since my tables were covered with paper, I didn't want them sitting at their spots if they had already washed their hands and taken off their paint shirts.
Also, I instructed my students to put their jars of paint down near the hand washing bucket and then scrub if they needed to. Well, this enticed two girls in my class of 14 to paint their entire hand black and then rub them together and show off their messiness to the entire class. I was busy moving all of the murals off the tables so they could dry since we still had 40 minutes to fill!!
Obviously, it is the end of the year, and kids to silly things, but as you might imagine, this was incredibly frustrating. I'm not one to shy away from messy projects just because they are messy, and I love fingerpainting, but for two of my best artists to be so reckless, in such a small class, who should totally know better...GRRRR. It's okay though, I made them wash their hands very last, and stand off to the side while I explained the next project to the rest of the class.
I told them they wouldn't get to participate in the 'artist trading cards' that we would be creating.
I did let them make cards.
I'm weak. Its the end of the year, it was just a little paint.
 Anyway, back to the murals!!
I let those dry until the next 1st grade class two days later. Let me clarify, I have two small 1st grade classes, but I still see 20 classes a week, 11 of those are kindergarten....so I chose to do this with my two smallest classes since I hadn't taught this type of lesson previously. It would work with any grade.
Before the next class, I prepared 20+ colors of paint, using white to create tints.
I also painted over the lettering with white so it would really stand out.
I had the students do the exact same procedure as I had done with the previous class, go in, put on a paint shirt, stand behind your chair. I had them gather around one mural once everyone was dressed in their shirts, and I demonstrated how they would use their color to pain in one of the shapes, scoot over and paint in another shape.
I explained that once they had used the color on one mural, they would move on to other tables and put their color on every mural.
I also told them not to paint on top of the white words and gave them the same rules as I had given the previous class about not painting on top of someone's work.
During this class period, the school maintenance team came into my room to talk to me about my new cabinets for next year. Of course they did. I took them around and explained what I wanted and where I wanted it. I was distracted for a few minutes, but the students continued to work quietly on the murals. Whew! I was fully prepared for madness to break out at any second with paint flying, but thankfully, everyone was cool and no one dropped their paint jar or got out of control.
Pretty soon, students started to get 'done' painting. I had joined them, painting with white. I was filling in a few spots on the murals without lettering as well as touching up the white lettering, covering drips etc. Frustratingly, I wanted to keep painting...but after a few minutes....one boy was done and then, suddenly, everyone was done.
 Most of the murals were finished, but a few needed more colors. I realized that I needed to move the huge-really-wet-painted papers to other spots around the room and give the 'finished' students an activity otherwise it would get out of control really fast.
It was a little wild, because the kids couldn't sit at the tables, and some of the tables and chairs needed to be wiped off after we painted, and I was the only one who could maneuver the big papers. As soon as that little moment of craziness had passed (no one painted their hands this time), I directed the students to their seats and demonstrated how to create artist trading cards.
You've probably heard of this activity before, students create a series of drawings to trade. I let mine choose their own subject, and they could use markers, colored pencils or crayons to color them.
It is a fun end of the year activity. WOW! As soon as the class had their little blank cards, pencils and fine point sharpie markers, they got right to work, creating little masterpieces. It was as if the group activity had warmed them up.
 |
| A little bit 'Keith Haring' |
Without even telling them to, they were completely enthralled in the activity.
They knew they had limited time because we were going to trade cards at the very end.
If they finished early, they could make an extra card to look at a book while they waited to trade...The students whispered....they whispered to each other....and to me if they had a question. (I was in touch-up mode on the murals, covering drips and finished the two that weren't quite done).
I had to stop and look around.....the class was completely engaged in the process.
It was magic.
Towards the end, the last 7-8 minutes, students were allowed to trade cards. Some were finished, some weren't. But the ones that weren't could take their cards and finish them later.
This was a very successful end of the year project, and I can't wait to put the large paintings up on my bulletin boards.
If you are low on patience this late in the year, beware.....I've tried to be as honest as possible about what worked for me so that you don't make the same mistakes I made.
I would definitely do this again.
It was a really great collaborative project.


No comments:
Post a Comment